No products
Last blog articles
 Kel-Tec Sub 2000 9mm — The Home Defender
  DELTAC Extended slide lock for Glock Gen 1-4 VS Gen 5
  The Proper Pistol Grip
  Don’t Lose Your Thumb! How to Correctly Grip Your Revolver
 Search on blog

eBay feedback
99,4% of positive feedback
Item as described:
Communication:
Shipping time:
Shipping charges:
love it
djcarnage2013
AAAAAA
troy9193
Great part, and fast shipping.
michaeldurkee
Quick 3 day shipping and item as described. Good seller
jplog2146
Excellent transaction, as always, great seller! Buy with confidence!
killhouse2
Looks great and fits great
gp4lyfe.2013
Item as described. Quick shipping A+ seller!
fammof5
Great parts, service, and fast shipping.
mictetr_7
A+
oneup99
Super fast shipping
johnny12115
Fast reliable shipping and product as described. Excellent.
jonh1373
nice
musicman502006
good. ebayer
2578danf
Top quality EBay seller.
starship46
Great Transaction! Great Deal!
graniteguy52
A+
kc11276
Fast shipping great seller
krw1983
Great Seller!!!
lastofthebreed02
A+++ seller!!fast shipping awesome seller A++++
daneyboy007ayo
Highly recommend, fast shipping, pleasure to do business with. Thank you.
ldri1949
Perfect for my G19 Gen 5! I mean PERFECT! Thanks
jg60-2013
excellent
lesnyder45
Very nice
chevtrucken
Exactly as described, plus fast reasonable shipping and a great price. A+++++
comport8
Great service
jr2022
Last Product Reviews 


Store Reviews ( 0 )  (0/5)
(0/5)
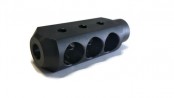
(0/5) Muzzle threading instructions
Published : 12/22/2016 21:55:16
Categories : Muzzle brakes
Please understand that information and tips provided here are meant to benefit our customers who have carefully considered the possible hazards of modifying a firearm. We, by no means, want to alleviate your concerns regarding the safety and value of your firearm should you make a mistake. Please consider your skill level, experience, and competency before purchasing any of these tools or trying to use these methods.
Funding USA LLC accepts no responsibility for results that may occur by following these tips. If you have already purchased the necessary tools, and are having second thoughts about cutting your barrel, please consider taking the tools and gun to a qualified gunsmith and ask him to perform the work.
Make sure also to verify the legality of your modifications. State, Local, and Federal laws apply.
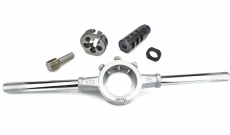
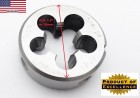
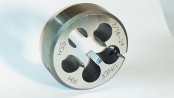
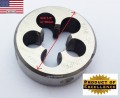
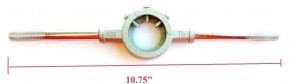
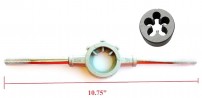
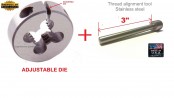
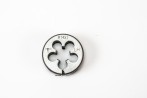
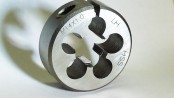
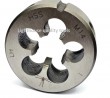
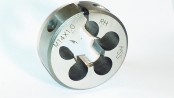
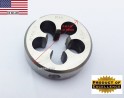
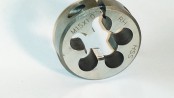
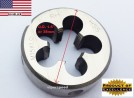
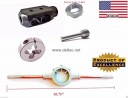
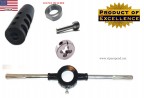
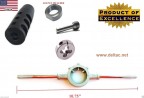
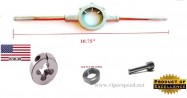
Muzzle Threading
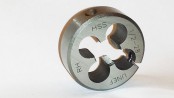
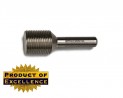
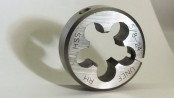
Screw the TAT about 4-5 threads into the back of the die with the pilot sticking out in front.

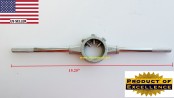
Insert die and TAT into handle, preferably lettered towards you and aligning at least one of the tightening screws in the handle with the divots in the die OD

Secure the barrel vertically in a padded vise

Apply a good cutting fluid/oil to the die teeth and start cutting. It will take a little bit of vertical downward pressure to get started. Apply even downward pressure and rotate the die slowly.

.
Repeatedly advance the die about 1/8 turn, then back it off to break up the shaving (chips).
Do not allow the face of the TAT to ever reach the barrel face. This could strip the teeth out, possibly damaging the TAT and ruining the few threads that you have cut on the barrel

. Once you’ve cut about 4-5 threads, and before the TAT reaches the barrel face, unscrew the die completely, loosen the 2 tightening screws on the die holder, and remove the TAT
With the TAT removed, put the die back in the handle and hand tighten the 2 tightening screws.
Resume threading as above, breaking the chips and applying cutting fluid as you go.
Thread to the desired depth, blow off the threads and check the fit with whatever muzzle device you plan to use. You want the threads firm but able to screw on by hand.
If your threads are too large, tighten the 2 screws in the handle a little bit, apply more cutting fluid and run over the threads again. Blow off the threads and check the fit again. Repeat as needed.
If necessary, you can take the die out of the handle, unscrew the preset screw in the die itself, and place back in handle, tightening the 2 screws for an even smaller thread.
Hopefully this information will help you successfully complete your barrel threading project. Make sure to wear protective glasses throughout the process and Take Your Time!. This type of work can be very rewarding when all goes smooth, or a disastrous, aggravating, mess if you try to rush.

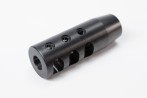
NOTE: This device should be installed by a competent gunsmith to ensure concentricity and clearance at exit hole


